
Why I Can Lay Out a PCB Quickly
I use a fast, practical PCB layout workflow that takes a beginner board from schematic to export-ready Gerbers while avoiding theory and wasted time at every stage.
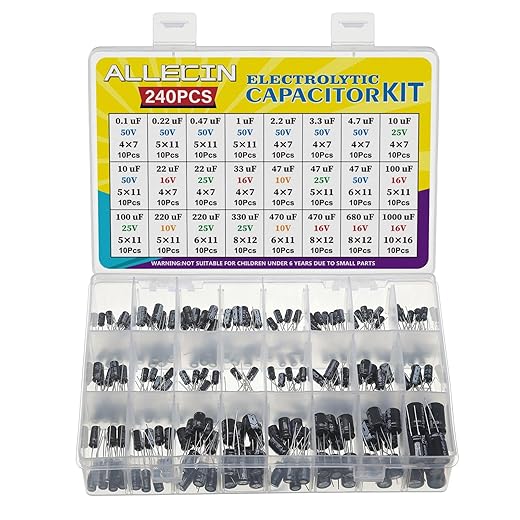
What I Use Before I Start
I use:

Prepare the Schematic and Footprints
Why I obsess over footprints first — small mistakes here cost hours later.Clean the schematic — I remove unused symbols, annotate designators, and confirm pinouts and part values against datasheets (e.g., verify MCU VDD pins and a 10k reset pull?up).
Pick footprints from datasheets — I choose land patterns, adjust pad sizes for solderability, and add thermal or solder fillets when needed.
Create custom footprints when required — I model odd connectors or QFN thermal pads.
Add net labels and define critical nets (power, ground, high?speed, analog).
Note placement constraints (connectors at the edge, visible LEDs, sensor orientation).
Set board outline, layer stackup, units, and DRC rules before placement to avoid rework.
Place Components for Flow and Manufacturability
Think like an assembly house — fewer headaches, faster fixes. Want fewer re-spins?Place connectors and power parts first; I anchor mechanicals at edges and set connector height so cables mate cleanly.
Orient polarized parts consistently; I point electrolytic caps and diodes the same direction to speed assembly and inspection.
Cluster related circuits and keep sensitive analog away from noisy switching areas; I group ADC front?ends in a quiet corner.
Leave room for routing, test points, heatsinks, and probe access; I reserve straight trace channels and space for rework.

Route Power, Ground, and Critical Signals First
Start with the boring stuff — routing power first saves you from spooky noise later.I route power and ground before signals. I pour a ground plane on an inner layer or the bottom to reduce loop area. I route wide VCC and GND traces, add thermal reliefs where needed, and place decoupling caps adjacent to IC power pins. I stitch ground with vias and annotate via sizes for the board house.
Final Checks, DRC, and Exporting Gerbers
Don’t ship until I triple-check — one oversight wastes days. Want peace of mind?Run ERC and DRC — I run checks and fix clearance, copper, and footprint errors I missed.
Inspect silkscreen and solder mask — I remove overlaps and slivers, enforce keepouts, and add fiducials, tooling holes, or panel notes for batches.
Generate fabrication outputs — I export Gerbers, NC drill, and a README with layer stack and thickness, then inspect in a Gerber viewer.
Export assembly files — I export BOM and pick-and-place, then review this checklist:
Ship Confidently
I follow this workflow to quickly produce reliable beginner PCBs; I iterate—build, smoke-test, and revise—so disciplined placement, routing, and final checks minimize surprises, speed up fab turnaround, and save debugging time. Try it, share your boards and feedback with me.
I appreciate the “final checks, DRC, and exporting Gerbers” focus. Too many people rush to fab without doing a final sanity pass.
A little story: I once sent a board with thermal reliefs disabled for all vias — meant to make them robust, but it messed up soldering and rework. Learned to double-check thermal settings and run a quick panel-level thermal shock check (if possible).
Also, can we have a short section about design intent comments in the PCB files? Leaving notes like “Do not change this trace” or “Keep 3mm clearance” saved me when I handed designs to a colleague.
Keep these guides coming, they’re very practical and not too preachy.
100% agree on comments. I use a top silk comment block with assembly notes and a ‘last edited’ timestamp. Helps when multiple people touch the files.
Also include expected test voltages and programming headers in the notes — saved me from accidentally applying 12V to a 3.3V rail once.
Great anecdote, Lydia — thermal reliefs can be sneaky. I’ll add a small section on leaving design intent comments and using the PCB editor’s comment layers. Those notes are invaluable when collaborating or revisiting a project months later.
For teams, keep a CHANGELOG.txt in the project folder. Comments inside the board are great, but a versioned changelog prevents ‘who changed what’ mysteries.
Solid guide but I felt the section on footprints was a bit light. If you’re trying to speed things up, creating or verifying footprints takes time but is crucial — wrong pad sizes = soldering nightmares.
Also, a lot of beginner tutorials gloss over panelization. Even for small runs it’s useful to think about how boards will be assembled and depanelized.
Agreed. I once had a footprint rotated 90° in the library vs the schematic symbol. Took forever to debug. Always double-check orientation and paste mask too!
Panelization saved me money on my last run. If your fab charges per job, batching multiple boards in a panel can be cheaper even with depaneling costs.
Good point, Tom. I tried to keep it high-level for beginners, but you’re right — footprint verification deserves more emphasis. I’ll add a short checklist for footprint review and a note on panelization strategies in the next revision.
This was exactly the kind of step-by-step I needed. The “Place Components for Flow and Manufacturability” section is gold.
A couple of practical things that helped me:
– Put connectors on board edges first.
– Group decoupling caps close to their pins before placing ICs.
– Keep test points accessible if you plan to debug later.
One small critique: a couple of your screenshots had tiny silkscreen overlaps that might get clipped at assembly houses. Maybe add a short note about silkscreen clearance vs. fab house capabilities.
Ah yes, silkscreen! Cost me a bunch of headaches on my first run. Also remember to check for overlapping text at 0.5mm size — it can become unreadable after solder mask.
Great tips, Marcus — and thanks for the silkscreen heads-up. I plan to add a note about fab variances. As a rule I recommend looking at your PCB fab’s DFM guidelines; most have minimum silkscreen clearances and suggest keeping silks off pads.
fun read ?
I love the “Ship Confidently” bit — wish someone told me that before my first panel of 10 PCBs got held up bc of a missing fab note. Also, tiny rant: why do silkscreens always decide to merge into a R in my CAD app?? sooo annoying.
PS: does anyone have a go-to checklist they run before exporting gerbers? I usually forget one file and panic.
For the silkscreen R-meltdown, make the font slightly bigger and avoid rotated thin fonts — that helped me.
I use a very short checklist: DRC, all nets are connected (no floating nets), thermal reliefs on through-hole pads where needed, and BOM + centroid file. Saves time.
Ha, silkscreens have minds of their own. For Gerbers I include: top/bottom copper, solder mask, silkscreen, drills, board outline, and a readme with layer pairings and units. Also run DRC, fab rules, and do a quick Gerber viewer check before uploading.
Also export ODB++ or IPC-2581 if your fab supports it; it can reduce ambiguity compared to raw Gerbers.
Quick technical question: when you talk about routing ground first, do you recommend a poured ground plane or star grounding for mixed analog/digital?
I’ve got an audio ADC next to a microcontroller and I’m torn between splitting planes vs. using stitched polygons. Curious about people’s experiences — tradeoffs, tips, what worked in practice.
Extra tip: run a quick sim or use a handheld scope on a prototype to see if noise coupling is an issue before committing to complex splits.
Don’t forget to consider the return path. Even a plane split can cause unexpected loops if the return current needs to hop layers; add vias to guide returns.
If space allows, put the ADC and its reference close together and give them a little island of clean ground. Also low?ESR caps are your friend.
I had good results with a solid plane plus a thin moated separation: keep analog ground around the ADC and tie to digital ground at a single capacitor near power entry. Also route noisy clocks away from ADC traces.
For mixed analog/digital on a simple 2-layer board, I usually go with a solid ground plane where possible and use component placement to separate noisy digital sections from sensitive analog ones. Stitching and ferrites can help at the interface. Star grounding is more of a wiring-level solution and is awkward on PCBs unless you have a dedicated quiet ground area. If it’s critical, separate the analog ground and connect at a single point near the ADC’s return path.
Nice write-up! I liked the bit about routing power and ground first — that alone saved me hours the last time I tried a board.
Quick question: when you say “route critical signals first”, do you mean length-matching everything or just the handful of high-speed traces? I know sometimes people obsess over lengths for every signal and it gets messy.
Overall super practical guide, easy to follow.
Totally agree — I used to try to length-match everything and ended up frustrated. Now I only match the ones called out in the datasheet or marked as critical.
Also remember that for short boards (like hobby projects) the tolerances are often forgiving. Do what makes sense for manufacturability and repeatability.
Thanks Claire — great question. I prioritize true high-speed lines (clocks, DDR lanes, USB3, etc.) for length-matching and impedance control. For slower signals I focus more on routing cleanliness and avoiding crossing noisy domains. If it’s a beginner board, keep it simple: only match what absolutely needs it.
This guide made me feel like I could actually finish a board in a weekend. Which is both impressive and terrifying ?
Short tip: always label connectors with reference names on the silkscreen. Saved my future-self so many headaches.
Yes! Also add polarity markers for LEDs and caps. Future-you will thank you.
Love that tip — small silkscreen labels are a huge quality-of-life win for debugging and assembly.