
My fast Arduino build — a quick roadmap
I built an Arduino project quickly by narrowing scope, choosing simple parts, coding a minimal core, and iterating fast. Crazy fact: I finished a working prototype in 3 hours exactly.
What I used
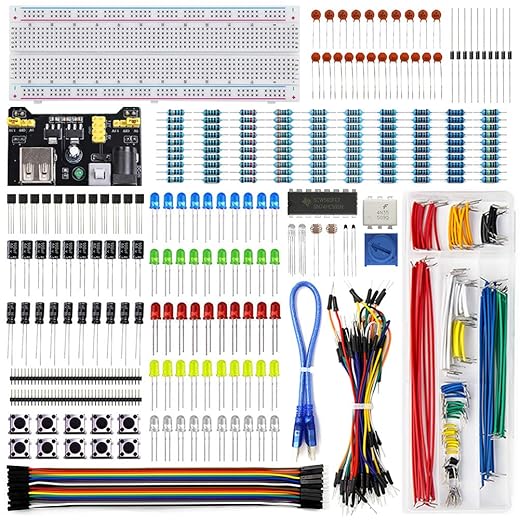
I used an Arduino Uno (or compatible), breadboard, jumper wires, basic sensors/LEDs, USB cable, computer with Arduino IDE; soldering iron optional, patience, C-like programming knowledge.

Define a tiny, achievable scope
Why I forced myself to pick one tiny goal — the secret to finishingDefine one clear, tiny goal: a single sensor or actuator — for example, a DHT11 temperature sensor logging to serial or a pushbutton that toggles an LED.
Timebox development to a few hours per day and prioritize end-to-end functionality over perfection.
Choose parts I already own and pull libraries for common sensors so I focus on wiring and core logic.
Log small changes daily to track progress.

Gather parts and assemble fast
I scavenged parts and beat shipping delays — cheaper and faster, right?Gather parts I already have and avoid long lead times: sketch a simple wiring diagram on paper or whiteboard.
Group components on the breadboard — I arrange by function so traces stay short. Test each connection with a multimeter; I verify power, ground, and signal continuity.
Substitute similar parts or feed mock signals when missing — I used a potentiometer to emulate a sensor. Use proven libraries and example sketches to validate hardware. Iterate wiring and code until I have reliable basic functionality.
Code the core quickly
I started from examples and hacked them — faster than rewriting driversWrite minimal, well-commented code that achieves the core behavior before I add features.
Start from an example sketch (e.g., Blink or DHT), strip unrelated parts, and keep only the loop logic I need.
Wrap hardware access in small functions like readSensor() and setActuator(), and use simple state logic. Add Serial prints to monitor behavior; when timing or readings are off, make tiny fixes and re-upload often.
Keep the code small and testable so I find bugs fast and integrate new features without breaking the prototype.
Test, iterate, and finalize
I tested relentlessly and shipped a minimal polish — one polished feature beats ten half-done onesFocus on end-to-end scenarios: I test power-up, sensor reads, actuator responses, and graceful failure modes (brown-out or disconnected sensor).
Document known issues: I fix critical bugs and stabilize timing (use millis() for non-blocking delays; adjust sample rates).
Add usability features: I add status LEDs and simple Serial commands for calibration (e.g., send ‘c’ to calibrate zero).
Carry out quick remedies when sensors misbehave: I swap the unit or add smoothing like a running average or a simple low-pass filter.

Go build fast
I guarantee these steps will shave development time and teach practical skills—start small, iterate fast, enjoy building a working Arduino project, then share your results and inspire others to try.
Quick note on balancing speed vs reliability:
I know the guide pushes for ‘fast’ which is great, but I’ve seen too many ‘fast’ builds fail at demo because of flaky wiring. My trick: after you get the core working on a breadboard, spend 30–60 minutes soldering the critical connections onto a perf board and powering it through the same cable you’ll use in the field. That little extra step reduces flaky failures massively.
Also, write a 1-paragraph README for yourself with: purpose, how to power, where pins are connected. It’ll save time later when you revisit the project.
If you want to go super fast but more reliable, try hot-gluing the connectors after testing on breadboard — ugly but prevents accidental disconnections during demos.
Seconding the README idea. I always forget which pin I used for the buzzer until I open it and stare for 10 mins ?
Love the perf-board suggestion — that 30–60 minute investment is worth it. I’ll add a short ‘stability hacks’ box with your advice + the README tip. Thanks!
Added both soldering and hot-glue as options depending on time and permanence needed. Appreciate all the practical tips!
Great write-up! I loved the ‘tiny, achievable scope’ idea — I usually over-engineer the heck out of things and get stuck. Kept this one to LED blink + sensor read and got a working prototype in a weekend. ?
Couple of quick tips from my run: keep spare dupont wires (they always disappear), and test the sensor wiring before soldering.
Minor nit: your parts list missed the female header I used for the breadboard -> perfboard transition. Otherwise, super practical and motivating — thanks!
Thanks Laura — glad the tiny-scope approach worked for you! Good call on the female headers, I’ll add a note in the parts list. Which sensor did you use?
Added a quick “extras” section (dupont wires, female headers, spare resistors) to the post. Appreciate the heads-up!
I lose dupont wires every week lol. Also, try labeling the cables with tiny washi tape — saved me once when debugging spaghetti wiring ?
Nice guide. Quick question — for the power supply, did you run it from USB or use a battery pack? I’m trying to make something portable and worried about brownouts when the sensor spikes.
I tested both. For the fast prototype I used USB power; for the final I switched to a 2xAA boost for stable 5V. If you have high sensor spikes, add a small capacitor (100uF) near the Vcc/GND of the sensor to smooth surges.
Love the step-by-step flow. The ‘code the core quickly’ section is gold — trimming features early saved me so many late-night merges.
A few things I ran into:
1) I initially tried to handle UI and storage at the same time — bad idea.
2) When testing, make small commits with clear messages. If something breaks after an iteration, you can revert just the last change.
3) Don’t forget to test edge cases (like sensor unplugged) even in a fast build.
Also, tiny rant: people who say “just add features later” and then never add them… ? But seriously, this guide is a good antidote to feature creep.
Haha the feature-creep folks are the worst. I make a ‘v1 checklist’ and refuse to go beyond it until it’s tested.
Agreed on small commits — a lifesaver. Re: sensor unplugged, good call; I’ll add a short bit about defensive checks (e.g., sanity ranges and fail-safe states).
Edge-case testing saved me last week — also use millis() for timing instead of delay() if you plan to add more tasks later.
Thanks for the concrete list, Sofia. I’m adding a short checklist paragraph under ‘Test, iterate, and finalize’ with your points.
Totally — I once shipped a demo with no fail-safes and my LED matrix fried my prototype. Learned to handle disconnection and out-of-range values.
This helped me snap out of analysis paralysis. One question: could you post the exact parts you used for the fast build (IDs or links)? I know you said ‘spare resistors’ but would love specifics so I don’t overbuy.
Also, for someone on a budget, what would you skip for v1?
If budget is tight, check local maker groups — they often give away spare modules. Also AliExpress or local surplus stores for clones and wires.
Glad it helped! I added a short parts list in the comments: Arduino Uno clone, basic 5mm LEDs, 10k resistors (pack), a DHT11 for temp/humidity (cheap), breadboard, dupont wires, and a USB cable. On a budget skip fancy enclosures and the DHT22 (use DHT11) — focus on sensors that get you the data you need.
Haha, ‘Go build fast’ should be on a motivational poster. I tried following this and finished a prototype in one evening — surprisingly satisfying. Typos: I think you meant ‘breadboard-to-board transition’ in step 2? Nice job otherwise ?