Ready, Set, Glow!
I guide you through my five-step DIY method to plan, wire, and install budget-friendly LED strip lighting so you can transform ordinary rooms into beautiful energy-efficient spaces with confidence today.
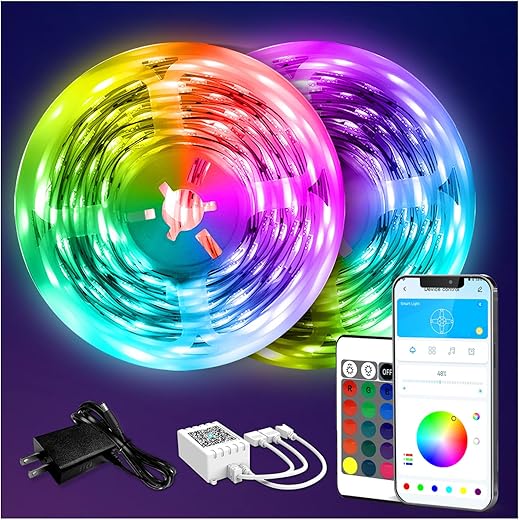
What You’ll Need
I need LED strips, power supply, controller, connectors or soldering iron, measuring tape, scissors, mounting clips/adhesive, wire, heat-shrink, multimeter, safety gloves, basic soldering skills, patience.

Plan and Measure
Do your homework — sloppy measurements ruin setups; I map everything first.Map the space and set goals: ambient backlighting, task lighting, or accent strips; I sketch a simple plan.
Measure lengths twice, note corners and power access, and calculate total LED length plus required voltage and current — I double-check run lengths.
Decide color (warm, cool, RGB) and whether I want dimming or smart control.
Sketch placement, pick an IP rating for damp areas, and budget for connectors and extras.

Choose Components & Power
Want stable lights? Don’t skimp on the PSU — I learned the hard way.Choose strips by LED density and voltage — I favor 12V or 24V (e.g., 30 vs 60 LED/m for softer vs brighter light).
Select a power supply rated at least 20% above my calculated draw to avoid overheating.
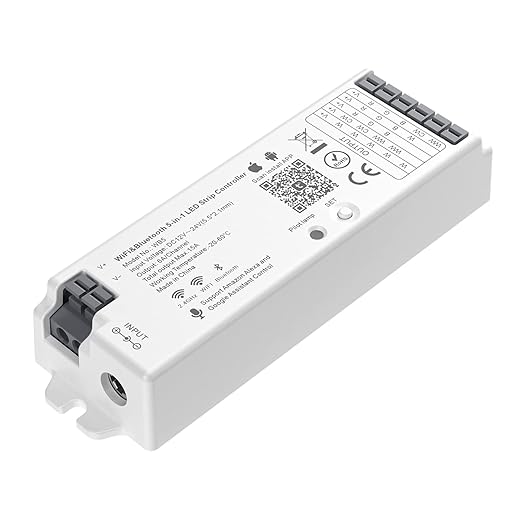
Pick color control: simple dimmers, Wi?Fi controllers, or smart hubs; I check compatibility with my network and voice assistant.
Stock spare connectors and a small inline fuse for safety.
Verify polarity and test briefly with a short powered section.
Cut, Join, and Wire
Soldering isn’t magic — it’s just practice. Or use clip-on connectors if you’re nervous.Cut strips at marked cut points — I cut between the copper pads (use scissors or a hobby knife). Peel back adhesive and plan joints.
Test each segment under power before final mounting to catch bad connections early.

Mounting and Powering Up
Beautiful results depend on neat installation — wires hide, mood shows.Mount strips using the supplied adhesive or mounting clips; I press and smooth to avoid bubbles for even light.
Route wires discreetly along edges or inside channels; secure them with cable clips or low?profile tape.
Connect the power supply near the strip and check voltage before applying power.

Test, Program, and Maintain
Don’t celebrate yet — I run thorough tests and backups, so I never chase intermittent failures.Run a full test of each zone: cycle red, green, blue at 50% and 100% to spot dimming, flicker, or color shifts.
Document connections with photos and notes; schedule checks every 6–12 months for adhesive failure, dust, or loose joins.
Final Glow
I followed these five steps and enjoy attractive LED strip lighting; try it yourself, share your results, and light your space—start your project today and show me what you made.
Okay, real talk: I tried to be fancy and soldered the strips together without masking the heat — ended up lifting pads. ? New strip purchase later, learned to use tape and proper heat. The guide’s warning about cutting at the scissor marks is crucial — don’t be me.
Worth adding: practice on a throwaway strip to build confidence before cutting into your main run.
If pads lift, you can sometimes scrape to reveal the trace and solder to that, but it’s fiddly.
You can also use solderless connectors if you’re truly solder-averse. They’re not as reliable long-term but good for prototypes.
Ouch, been there. Using a small heat sink clip on the pad or a tiny alligator clip as a heat sink for the pad helps. Also, flux and a quick soldering tip avoids soaking the PCB.
Awesome guide — super clear steps. I especially loved the “Plan and Measure” section; I messed up once by not accounting for corners. Quick question: for a 10m strip of 5050 RGB, the guide’s power calc seems right but do I need to inject power every 5m or is once at the start enough? Also, any tips for hiding the controller wires neat behind crown molding?
Thanks Emma! For 10m of 5050 RGB you should definitely inject power at both ends, and ideally every 5m to avoid voltage drop. For hiding wires in crown molding, I run a small channel behind it and staple flat ribbon cables or use thin hook-and-loop straps. Heat shrink + hot glue at the joints hides things and keeps them tidy.
I did the same length and had color fade until I fed power in the middle too. Also try using thicker gauge for the main feed (16–14 AWG) and smaller for segments — keeps voltage stable.
If you’re mounting under a floating shelf, aluminum channel with frosted diffuser hides all the wiring and looks pro. 🙂
Question for the community: has anyone used flexible diffusers vs rigid channels for curved crown molding? I’m installing along a rounded archway and worried rigid channels won’t bend nicely.
Flexible diffusers are your friend for curved installs. They’re typically silicone and can bend with the arch. Mount them with a combination of adhesive and small clear clips screwed into the underlying surface if possible.
I used a silicone diffuser for an arch and it worked great. The tradeoff is slightly less crisp edge but much better for curves.
Agree — flexible diffuser + led strip in a slim channel did my arch. Use a little waterproof silicone at ends to keep it secure.
Not a big DIY-er but followed the guide to install accent lighting behind my TV. Love the pop of bias lighting. A couple random notes:
– The “Final Glow” part about maintenance is legit — dust and sticky fingers dull diffusers fast
– Use a surge protected power supply if the TV is on the same circuit
Cheers! ?
Thanks for sharing, Sarah! Bias lighting behind TVs is such an easy upgrade. Good call on surge protection and cleaning diffusers gently with a microfiber cloth.
Couple of beginner questions: if I have a 24V strip, do I still worry as much about voltage drop? And what gauge wire is recommended for runs longer than 3m? Sorry if these are basic, just want to not blow anything up ?
Yes, fusing is in Step 2 considerations but worth emphasizing — protects against shorts and wiring mistakes.
Good questions. 24V helps reduce voltage drop compared to 12V for the same power, but it’s not immune — for long runs you still may need power injection. For runs >3m, consider 14–16 AWG for the main feed and 18–20 AWG for short segment pigtails. Always check the strip current draw and choose wire accordingly.
Also remember to fuse the supply appropriately. I use inline fuses near the PSU for peace of mind.
If you’re nervous, post your wire lengths and strip wattage and someone here can help calc the gauge.
Fun read! I followed the project and used an addressable strip for my bedroom. My only nitpick is the guide barely touched Wi-Fi vs RF controllers — I ended up using Wi-Fi and the latency in animations is noticeable compared to a direct RF remote. Not a dealbreaker, but worth mentioning.
Really helpful walkthrough. The soldering pics in “Cut, Join, and Wire” were clutch — I’m new to soldering and those close-ups saved me from melting a connector lol. One thing I think could be expanded: troubleshooting when a single color channel is dim. Might be a loose solder, bad LED chip, or low voltage, right?
Exactly — dim channel usually means a connection issue or a failing LED segment. Check solder joints, continuity with a multimeter, and measure voltage at the strip. Also swap the controller outputs (if safe) to see if the problem follows the output or the strip.
I replaced a dodgy solder pad once. If you have a magnifier, look for cold joints (dull gray). Reflow with flux and fresh solder fixed it for me.
Good point Olivia. Most 12V 5050 strips have built-in resistors, but if you’ve built a custom LED array, double-check.
Also check the resistor values if you used external resistors — wrong ones can dim a channel.
Pro tip: if a channel is dim only on a long run, it’s often voltage drop. Thicker wires + power injection solved it for me.
Loved the programming section. I’ve toyed with both preset controllers and custom Arduino setups. If you’re into syncing to music, a simple mic-based controller is fun, but addressable LEDs + ESP32 + WLED = next level. Tiny rant: the guide underplays heat management for dense LED arrays — ran into thermal throttling on a 24V COB-like strip.
I wrapped my dense strips in thermal tape to the aluminum channel — temps dropped a bunch.
Great additions — WLED + ESP32 is indeed fantastic for addressable strips. And thanks for calling out thermal issues — we’ll clarify that denser strips require better heat dissipation and possibly derating the brightness for longevity.
Just finished a small under-cabinet install using steps 1–4. My two cents:
1) Measure twice, cut once (obv)
2) Use aluminum channels — they act as heatsinks and look clean
3) If you’re new to soldering, buy a cheap soldering iron with adjustable temp
Mounting was the hardest part for me — the adhesive on cheap strips sucked, so I used 3M VHB tape. Saved my bacon.
VHB + clips is the way. I learned the hard way when a strip fell during summer.
Nice summary Jake — totally agree on channels and VHB. For long-term, mechanical fastening (clips or screws into the channel) beats adhesive alone, especially in kitchens where heat/humidity rule.
Thanks for the hands-on tips. One more safety note for people: always disconnect power before cutting or wiring, and double-check polarity on 12/24V strips — reversed polarity can fry the strip immediately. Also, label your wires if you have multiple runs — saved me hours when troubleshooting.
And take photos of your wiring before powering up — makes tracing much easier if something goes wrong.
Excellent safety reminders — disconnected power and labeling are in Step 2/3 but it’s worth repeating. Polarity mistakes are common and costly.